Introduction: The North Star

The stars truly are a magical presence, shining brightly in the sky every night. No matter where you live, you’ll be able to see the twinkling lights on a clear night’s sky. As we get older, we might start to wonder what we’re actually seeing as will strain our necks to find the loudest star.
So, what exactly is a star? The birth of a star begins inside the nebulae, which is a hydrogen-based cloud of dust. As thousands of years pass, pockets of dense matter are created. However, as soon as these are created they have then been destroyed thanks to gravity.
This is where the prostar is created and the star moves into its nascent phase. Over the coming years, the prostar becomes smaller and begins to spin faster, creating higher pressure and temperatures. This is called the Tauri phase, but this is very brief in relation.
After millions of years, the temperature will have risen to around 27 million degrees Fahrenheit and now nuclear fusion can start. This ignites the core of the star and moves it into the main sequence.
The majority of the stars in the sky that we can see are called main sequence stars. They shine brightly for millions of years, existing in a nuclear fusion state.
The star works tirelessly to convert hydrogen to helium, which emits so much energy that they can remain hot enough to be seen from earth.
Pretty amazing, right? It’s no wonder that you want to get into stargazing with so much going on up there. But where do you start on your journey? Today we’re going to be looking at what you’ll need, how to find the best places and the major constellations that you can find.
What is Astronomy and Stargazing?

Astronomy is the study of everything above us in the sky. The sun, moon, planets, and stars are included, and it is considered a science by NASA and other astronomers. There are two types of astronomers out there: observational and theoretical.
Observational astronomers focus on the study of space and like to see how the stars, planets, and galaxies have changed over time. Theoretical astronomers, on the other hand, analyze how the solar system might have evolved in the past, and how it will look in the future.
Stargazing is a better-known title for the term amateur astronomy. It is often done by people who do not have a scientific background and who are more interested in observing the stars for their own peace of mind and to relax them.
While some stargazers like to make notes of their findings and get into the science side of things, others simply like to gaze at the stars.
For some, it is as simple as that. Some people think that simply watching the stars is boring, which is why they choose to study them instead, but others find it interesting enough on its own.
If you’re just getting started in the world of space, chances are that you’ll begin with stargazing. Once you’re more familiar with stargazing practices, you can make the choice of whether you want to learn more about the astronomy side of things.
Finding The Best Place To Stargaze

Your stargazing experience will be altered drastically by where you position yourself. There are some amazing places to stargaze on earth, but there are some places you should avoid as well.
Here we’re going to look at how to find the best places locally for you to stargaze, as well as the best places to travel to in the world.
Start out local
Do you live in a city? As a rule of thumb, cities are not the best places to stargaze.
This is because all of the light pollution coming off of the city dulls down the sky and makes it harder to see what’s happening up above.
However, it is not an impossible feat.
There is a way that you can stargaze in cities so that you don’t have to travel too far out of town to use your telescope.

When you’re in a city, you need to get as high as possible to have the best chance of having a good stargazing experience.
This is true for anywhere you live, but in a city, it is rather more urgent that you find a high spot to reside. At the top of a tall building will do, if you can get up there legally and with permission.
If you live in a more rural area you have a little more freedom with where you stargaze. You should still try to find a place with little light pollution and you should situate yourself up high - the top of a mountain is one of the more favorable places among stargazers.
Chasing the stars

Local stargazing is good to get your bearings with your new hobby, but the nagging feeling that something better is out there will always be with you.
And it’s true - there are better stargazing spots out there than just your backyard!
Let’s take a look at a few that are located all around the world.
Brecon Beacons, Wales
The Brecon Beacons have very minimal light pollution and therefore are clear enough to see meteors showers, planets, and sometimes even the Northern Lights.
The Brecon Beacons are large enough that stargazers can all enjoy the show without being positioned too closely together, so you’ll still be able to enjoy time to yourself.
Death Valley National Park, USA
The canyons, dunes, and salt flats were originally the home to Timbisha Shoshone Indians. However, after the 19th century, it became more accessible and one of the best places to stargaze in the world.
While it is close to Las Vegas, where a lot of light pollution would be coming from, you can still see marvelous images through your telescope.
Aoraki Mackenzie, New Zealand
Above the Aoraki Mount Cook National Park and the Lake Tekapo are skies so clear that you can see the Magellanic Clouds all year round.
The Magellanic Clouds are two dwarf galaxies that orbit the Milky Way. If you’re ever near the southern hemisphere, this is definitely a stop to make along the way.
Atacama Desert, Chile
Deserts make excellent stargazing spots, and the Atacama Desert is no different. Combine the dry conditions with the 5000-meter elevation of the desert, and you have one of the world’s leading places for stargazing.
A lot of scientific equipment is positioned here for this reason exactly, but that doesn’t mean that there’s not enough space for you to join in.
Mauna Kea, Hawaii
Mauna Kea is a dormant volcano that reaches up to 4200-meters high. There is little light pollution which also helps towards making it one of the best stargazing spots in the world.
Scientists have positioned thirteen massive telescopes across the volcano to observe lights from other galaxies.
What Equipment Do You Need For Stargazing?

Stargazing sounds like a simple enough hobby, but it actually requires a few pieces of equipment that you need to take with you. We’ve listed the necessities below as well as a few pieces of equipment that aren’t necessarily urgent, but they’d aid your experience thoroughly.
Binoculars
Many beginner stargazers are urged to start off with some binoculars rather than spending a lot of money on a telescope right away.
Binoculars are much more portable and inexpensive, and you will still see much more through them than if you were simply looking with the naked eye.
You can also use binoculars for many other hobbies and you might even have some already stored away at home.

Just make sure that your binoculars have a decent range on them and that they are high-quality. Otherwise, you’ll have wasted an evening looking through foggy and blurry lenses.
Telescope

Once you’ve graduated from the binoculars, you can look for your very own telescope.
There is a lot to think about when choosing your first telescope because you don’t want to waste your money on something that is not going to aid you well.
The most important thing to look for is the aperture.
This refers to the diameter of the optical lens or mirror.
The aperture is in charge of collecting light and using it to make the images as bright and clear as possible.
Look for an aperture that is as big as possible as the telescope will be able to collect as much light as possible. None of your images will be too dark to make out by having a high aperture. The telescope you opt for will aid you well as long as you’ve followed the aperture rule.
Provided that you have found a high-quality telescope, you’ll be able to cart it around for years on all of your journeys. You should also consider the durability of the stand so that it doesn’t falter under the weight of your telescope.
Variety of Eyepieces
It’s likely that your telescope will have come with two different lenses.
One will be for lower magnification and the other will be for higher magnification.
These eyepieces will be fine for when you’re first beginning on your stargazing journey, but once you get more familiar with them you might choose to experiment with different lenses and filters.
For example, there is the Barlow lens, nebula filter, and moon filter to try out for yourself!

Once you’ve been stargazing for a while you can venture out to try all of these interesting eyepieces.
Finderscope

A finderscope is a navigator that can help you to find objects through your telescope quicker and easier.
This allows you to look at more than just one or two objects in the sky over an evening.
While your telescope might already include a finderscope within its technology, you might prefer to purchase a separate one as they tend to be higher quality and work better overall.
Observing Chair or Stool
You’re going to be stargazing for hours at a time, so do yourself a favor and find a chair or stool to take with you.
If you’re only using binoculars you can even take a lounger with you and have a nice relaxing evening!
However, if you have a telescope you can purchase an observing chair that has been specifically designed to be used for such occasions.
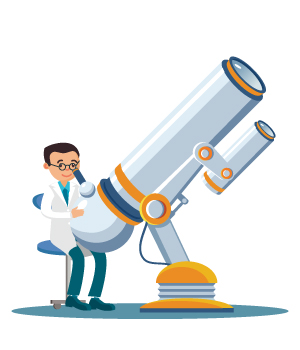
These chairs have an adjustable seat so that you can sit as low as the ground or as high as your eyepiece is. Some also come with a padded backrest so that your back won’t be cursing your name the next day.
Red Light Flashlight
When you’re stargazing, it will take at least 20 minutes for your eyes to become adjusted to the darkness.
Once you use a white flashlight for over 10 milliseconds, your eyes will reset to being not adapted to the dark at all.
This can waste a lot of your stargazing time and ruin the experience altogether.
However, instead of using a white flashlight, you can use a red alternative.
This will not ruin your adapted eyesight but you will also still be able to see all of your belongings.
Gone are the days of fumbling around in the dark for your lenses! You can either get a red handheld flashlight or a red headlamp.
Folding Camp Table
Okay, so a camp table isn’t a necessity when it comes to stargazing.
However, what are you going to rest your belongings on?
If you don’t want them to get wet or dirty while on the floor then you should consider a folding table.
Trust us, they’re much handier than they first seem.

Portable Power

You might need to take some power with you on your adventure, so a portable power bank or a generator can help you here.
As you’re aiming to get away from as much light pollution as possible, it makes sense that you won’t be near any mains power.
However, if you’re taking your laptop or phone with you that needs to remain charged up, a small portable power system can help you keep everything juiced up.
Some telescopes are electrically powered, so you might even need this for your telescope.
Portable power systems are heavy and some people think that they are a waste of energy, but it’s up to you to decide whether you need one or not. Just make sure that, if you’re bringing a generator, it isn’t too loud so that it disturbs everyone else around you.
Telescope Dust Cloak
If you’re stargazing in a desert or another dusty area, you might want to take a dust cloak with you to prevent any dirt or debris from getting lodged inside of your telescope.
This can be very irritating and it might even limit the lifetime of your telescope, so a protective cloak is definitely something to consider.
They’re not too expensive, either, so you won’t be wasting too much money on this accessory.

Some telescopes might already come with a protective cloak, but if yours doesn’t we would urge you to think about purchasing one separately.
Warm Socks

You’re going to be outside in the cold air for hours at a time, so you're going to need to be prepared.
Too many of us have begun our night in too thin clothing without thinking and have deeply regretted it.
So, make sure that you have warm socks and warm clothes in general.
We might even suggest that you take with you a few pairs of warm socks so that once one pair gets cold you can change them with a fresh pair.
While you might think that this is unnecessary, trust us. Once your feet get cold, it’s almost impossible to warm them up without a fresh pair of socks.
Thermos
Another thing to keep you warm, a thermos full of warm fluids is crucial for your stargazing.
When you see someone stargazing in the movies, you’ll always see them carrying around a thermos!
They definitely have the right idea, as there’s nothing better than a warm cup of coffee to get some heat back inside of your freezing body.
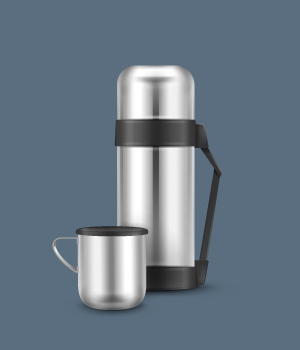
It’s also a good idea to take a thermos full of coffee with you to ensure that you don’t fall asleep at your post. The best sights are seen in the early hours of the morning, and the last thing you want is to have missed the main event because you fell asleep, right?
Notebook and pen

If you’re looking to get into the astronomy side of stargazing, you might want to consider taking some paper and pens to note what you’re seeing.
Even if you’re not interested in studying the sky you can still make a note of what you’ve seen.
Some stargazers like to give themselves the challenge of finding various different constellations.
You can use your stationery to remind yourself when and where you found a certain constellation or planet.
You might like to look back on all of your stargazing adventures in the future.
Your Phone
Finally, you should take your phone along with you.
Not only is it good for an emergency to call someone, but it can also be used for digital star maps and charts.
While you can get physical versions of these, digital versions are easier to read and you don’t have to carry around a large folder of paperwork.
Just remember that you don’t want your smartphone to ruin how your eyes are adjusted to the darkness.

So, make sure that your phone is already open on your star maps or charts before you begin stargazing.
Most apps take this into account and use dark backgrounds, but make sure that you check the app beforehand so that you don’t have to waste another 20 minutes.
Useful Apps For Stargazing

Speaking of phones, let’s take a look at some of the best apps that you can use while stargazing. Some are free while others require a small charge to be used.
All of the below apps are great assets for stargazers and they can be used to see space like never before. You can always download a few different apps and use them alongside one another to see which one you get on with the most.
SkyView Lite

With SkyView you can point your phone towards the sky and it will tell you which stars are located there, the constellations and if there are any satellites around.
This can be very beneficial when you’re stargazing so that you don’t have to keep reading lots of charts.
Instead, you can know what you’re looking at within seconds and spend more time enjoying its presence rather than hurrying to make out what it is.
The app also gives you a little background information on what you’re seeing and notifies you of stargazing events that are coming up.
Star Walk 2
Star Walk 2 offers amazing imagery to work alongside your telescope.
Simply point it towards the sky and it will tell you exactly what you’re looking at.
It is one of the most user-friendly apps that we have tried and it tells you everything you need to know.
One downfall of Star Walk 2 is that it has adverts littered around the app which can be annoying and break your adjusted eyes.

However, you can pay a small amount to remove ads from the app so that you are not disturbed during your stargazing.
Star Chart

Star Chart does exactly what it says on the tin - it is a star chart database all in one place.
Instead of carrying around lots of different charts in one giant folder, all you need is this app downloaded onto your phone.
This app gives you information about what you’re seeing, such as the distance, brightness, and references that you might find interesting.
All of this information will make you feel much closer to the stars and space, and you might even understand it all, too!
Night Sky Lite
Use Night Sky Lite to identify what you’re looking at through your telescopes, such as constellations, stars, and planets.
What’s more, the app will also tell you what the weather is going to be like so that you’re not unknowingly caught out in the rain.
Another interesting feature of this app is that there is a community page where you can ask for advice from other stargazers.
They might know a little more about the craft than you, so don’t be shy if you need a question answered.
In a few months, you might also be able to answer a few questions yourself!
SkySafari

Much like all of the other apps that we’ve mentioned, SkySafari allows you to point your phone towards the sky and it will tell you what is above you.
There are also other handy features such as voice control, which allows you to search things up instead of typing them, as well as the ability to take a closer look at different things in the sky.
NASA
We couldn’t end this list without talking about NASA themselves and the app that they have created for space lovers everywhere.
Although this is not necessarily a stargazing app, it is still an invaluable asset to take with you.
The app houses the latest images and information about everything in space that you’d be able to see from your telescope.
If you want to know more about something that your stargazing app has identified, you can search for it on the NASA app and learn everything there is to know about it.

How To Get Started With Stargazing

Now that you know a little more about stargazing and you have all of your equipment together, it’s time to put your new-found hobby to work and see what you can find up there in the sky!
There are a few things you should think about; however, before setting off and leaving this article only half-read.
Below we talk about how to get started with stargazing so that you make the most of your evening and don’t waste your time googling how to properly stargaze.
Choosing the right time to stargaze

Many stargazers prefer to stargaze in the wintertime as there is less humidity to deal with.
The sun also sets quicker and therefore the stars come out earlier so that you don’t have to wait until the early hours of the morning to appreciate them.
The reason why humidity is bad for stargazing is that it can leave a haze in the air that can fog your vision of the stars.
The less viability you have the less likely you are to see smaller stars and planets, and chances are that these are the things that you really want to see.
However, the stars are always changing and some people like to stargaze all year round so that they can see as much as possible. If you want to stargaze in the summer, bring a hairdryer with you to remove water droplets from your telescope.
Adapt to the situation
As we’ve mentioned earlier, your eyes need to be adjusted to the darkness so that you can see properly through your telescope and make the most of your stargazing time.
A fun little game is to look through your telescope once you first arrive at your chosen observation spot.
Notice what you can see before sitting back and waiting around half an hour for your eyes to adjust.
Keep them relaxed and avoid straining them while you do this.

After the time has surpassed, take another look through your telescope.
How much more you’ll be able to see will give you a surreal feeling. Once your eyes are acclimated make sure that they aren’t reset as this will affect how much you’ll be able to see through your telescope.
Make sure everything is ready beforehand

Mirroring the previous point, it is vitally important that you don’t ruin your eyes being adjusted to the dark.
To avoid this, you don’t want to use your phone as this can affect your eyes.
So, before you allow your eyes to adjust to the darkness make sure that everything is ready.
Your app should be open on your phone before your eyes adjust.
We like to ensure that our phones are set to never lock themselves while we’re stargazing so that the lock screen doesn’t affect our eyes too.
You can use a red flashlight to look for your other equipment, but if you don’t have one of these you should lay out everything so that you know where it is without using your phone's flashlight.
Get comfortable
No one needs to be sat in an uncomfortable position for the entire night, and no one wants to be stood up for hours on end.
Make sure that you put your comfort first and choose a nice seat option that isn’t going to hurt your back.
Some people prefer to lay a towel down on the ground and simply sit there, although we don’t find this as comfortable as an actual seat.

Also, stay as warm as possible!
You’re never going to be sweating while in the cool temperatures of winter, but make sure that you don’t get any ailments from your expedition either. Remain warm by bringing extra blankets, socks, and jackets. Oh, and don’t forget your thermos!
Socialize with people

Stargazing doesn’t have to be done in silence, and it can sometimes be a little boring if you’re waiting for something to happen.
So, why don’t you enlist the company of your friends or family?
They don’t have to stay for the entire evening, but it might be nice to bond over a telescope and a plastic cup of coffee.
If none of your peers want to go with you, it’s their loss.
Instead, why don’t you join a stargazing group and meet a lot of like-minded people to chat with and learn more about space with? They will also know the best spots to visit so you’ll get the most out of your time.
Just enjoy the sky
You can’t win them all, right?
If you don’t see much on your first stargazing trip, don’t worry about it.
Chances are that you will have had an interesting time and you’ll have learned how to use your telescope a little more.
If you can’t make out the constellations that your app is telling you there is, take it as a learning experience and move on.
There’s no use getting stressed over nothing!
What even is that, anyway?
How do you know the difference between a star and a planet?
Well, a star will twinkle when you look at it for a few seconds.
Planets don’t emit light themselves, but rather reflect the light from the stars.
So, if you see a star that is not twinkling, it’s almost always a planet.
You might also see a meteor flying across your lens, but blink and you’ll miss it!
These are small pieces of space dust burning their way across the atmosphere. They’re very cool to see, especially through a telescope.
Enjoy everything that you can see through your telescope, even if you don’t know exactly what it is.
Identifying Your First Five Constellations

Okay, so looking through a lens and seeing lots of stars is cool, but what about the constellations?
There are 88 officially recognized constellations in the modern world for you to find, but let’s just focus on the first five. These are the most common constellations to find and we think that they’re the most interesting as well.
Ursa Major
The Ursa Major loosely translates into the ‘great bear’ from Latin.
The smaller bear is considered Ursa Minor, another constellation that you can find.
The Ursa Major is the third largest constellation, with its brightest stars forming the Big Dipper.
To find this constellation, look for the Big Dipper. This is seven stars shining brightly in the shape of a saucepan.

Once you’ve found this you should be able to find the rest of the great bear. Remember that the Big Dipper is the tail of the bear, so you are looking for the body, the legs, and the head.
Leo

Leo is another one of the largest constellations in the sky and it is also one of the zodiac constellations.
The stars Denebola and Regulus are a part of the Leo constellation, as well as Wolf 359.
You should be able to easily find this constellation as the Big Dipper points straight to Leo.
The constellation features a hooked shape, which represents the lion’s head, leading to a triangle which is the rump and tail of the animal.
Orion
The Orion constellation is named after the hunter from Greek mythology.
However, despite its name, this is one of the easiest to spot constellations in the sky.
You might have heard of Orion’s belt, which is made up of Mintaka, Alnilam, and Alnitak.
Look for three bright stars all situated together in a straight line.
These are the stars that makeup Orion’s belt.

Once you locate this, it should be much easier to make out the hunter in all his glory. Two bright stars above his belt will be his shoulders, and two below the belt are his feet.
Hydra

The constellation Hydra is the largest of them all, yet can only be best seen in January and February.
Hydra gets its name from the water snake, which makes sense as it is a long and thin constellation.
There is only one bright star in this constellation, making it one of the most difficult to find and see.
It is made up of 16 stars in total, most of which make up a snaking line through the sky.
At the top of the constellation; however, there are five stars that make the head of the snake. If you look for the star Procyon, the head of Hydra will be to the left.
Cassiopeia
Cassiopeia is another easy to find constellation using the Big Dipper.
Cassiopeia can be found near Polaris and is simple to spot thanks to its unique ‘W’ shape.
You can use the Big Dipper’s pointer stars to accurately find Cassiopeia.
Cassiopeia is named after the vain queen from Greek mythology but is sometimes better known as the ‘W constellation’.
It contains the Heart Nebula and the Soul Nebula, as well as the supernova remnant Cassiopeia A.
Summary: Follow The Lights
We hope that you feel a little more ready to tackle the joys of stargazing. Once you’re out there and you see your first constellation, you’ll wonder why it took you so long to go in the first place!
Stargazing is known as amateur astronomy, and astronomy is better known as the study of space.
There are thousands of places all over the world to go stargazing, some of which offer you truly remarkable sights. However, you don’t have to travel far if you don’t want to.
There are plenty of places around you right now - just make sure that you get us high and away from as much light pollution as possible.
You can take bags of equipment with you if you’d like, but the most important thing is a telescope or a pair of binoculars.
The latter is better for someone who isn’t sure if they want to invest in a telescope just yet. Once you have a way of seeing the stars, you can add to your equipment list to make your experience as comfortable and enjoyable as possible.
Downloading an app onto your phone will greatly help with learning the basics of stargazing.
There are plenty of tips and tricks to make your experience the best it can be, but you will need to use some trial and error to find out what helps you stargaze the best. Once you find the five constellations we mentioned, what’s stopping you from finding 83 more?
Enjoy your stargazing adventures and don’t forget to take notes on everything you see. You’ll look back on them in the future!
- I Can’t See Anything Clearly Through My Telescope – Help! - April 26, 2022
- Astronomy For Beginners – Getting Started Stargazing! - April 26, 2022
- Are Telescopes Easy To Use? - April 26, 2022
